
Table of Contents
- Why Deck Stairs Become Slippery and Dangerous
- What You’ll Need to Remove Algae From Deck Stairs
- How to Remove Green Algae From a Wood Deck Step-by-Step
- Before you touch anything: control the slip hazard
- Step 1: Inspect the stairs and map the problem areas
- Step 2: Wet the stairs and apply cleaner
- Step 3: Scrub each stair, tread, riser, and edges
- Step 4: Rinse from the top down
- Step 5: Dry the stairs completely
- Step 6: Repeat on stubborn growth
- A note on pressure washing stairs
- Best Cleaner for Algae on Wood Decks and Stairs
- Using Sodium Percarbonate Deck Cleaner for Safe Results
- How to Prevent Algae on Deck Stairs Long-Term
- Verifying Your Stairs Are Safe Again
- When to Call a Professional
- Frequently Asked Questions
Last Updated: October 12, 2026
Why Deck Stairs Become Slippery and Dangerous
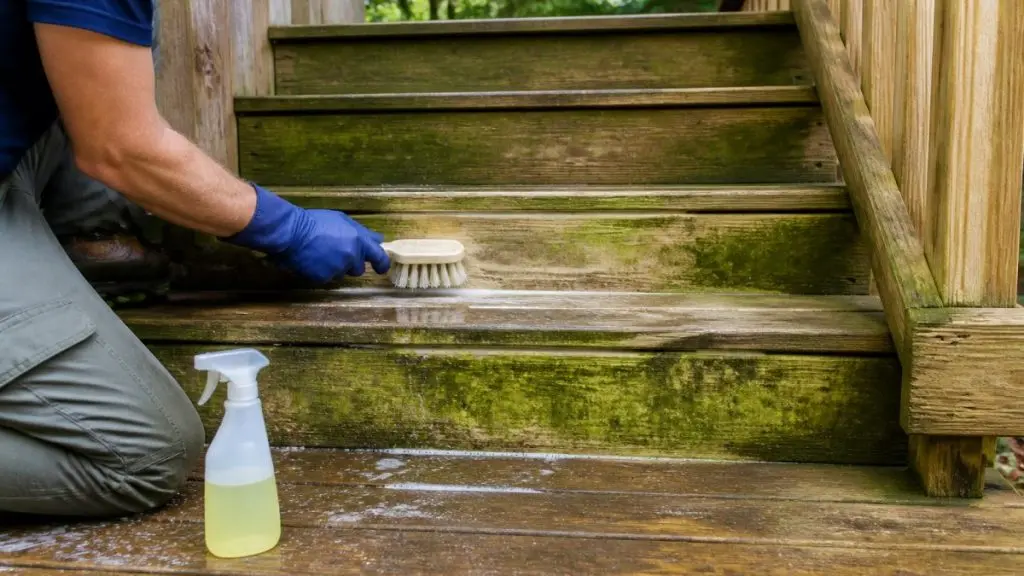
Deck stairs turn slippery because moisture, shade, and organic growth create the perfect storm, and learning how to remove slippery algae from deck stairs is essential for safety.
The real culprit is green algae: microscopic, fast-spreading, and dangerously slippery once it takes hold.
The algae keeps coming back because the conditions that created it never change, understanding why is the first step to fixing it.
What You’ll Need to Remove Algae From Deck Stairs
You don’t need expensive equipment:
- Cleaner: An oxygen-based cleaner or sodium percarbonate solution
- Sprayer: Garden hose with spray nozzle or pump sprayer
- Brush: Stiff-bristle deck brush or long-handled scrub brush
Skip the pressure washer on wooden stairs, high pressure damages wood grain and can splinter the surface. A garden hose and brush do the job safely. Oxygen-based cleaners are gentler than bleach, breaking down algae without stripping the finish.
How to Remove Green Algae From a Wood Deck Step-by-Step
This is the part most guides get wrong about how to remove slippery algae from deck stairs. Stairs are not a flat deck: you work on an incline, on an elevated surface, with edges, joints, and hardware that trap water and grow algae differently. Treat the stairs as their own job.
Before you touch anything: control the slip hazard
Algae-covered stairs are slippery when dry and treacherous when wet. Cleaning makes them wet. Plan for that first.
-
Block access. Close the gate or set a physical barrier at the top and bottom, a folding chair or traffic cone works. Do not rely on a verbal warning.
-
Work from the bottom up. Stand on the ground or a stable step below the one you are cleaning. Never stand above a wet, algae-covered tread and reach down, that is how the fall happens.
-
Wear slip-resistant shoes with real tread. Rubber-soled work shoes, not flip-flops or smooth-soled sneakers.
-
Keep a second person nearby if the stairs are steep, tall, or have a landing.
Do not start cleaning until the stairs are blocked off. The moment water hits dried algae, the surface becomes far slicker than it was before you started.
Step 1: Inspect the stairs and map the problem areas
Walk the stairs slowly before you wet anything. Look for more than green film.
- Treads (the part you step on), check the front edge (the nosing) and the back where the tread meets the riser, where algae collects.
- Risers (the vertical face), often ignored, but growth here drips onto the tread below.
- Stringers (the angled side boards), check where they meet the treads and the ground.
Probe any soft spots with a screwdriver. If the wood gives, the algae is the smaller problem, that board may need replacement before cleaning is worth doing.
Step 2: Wet the stairs and apply cleaner
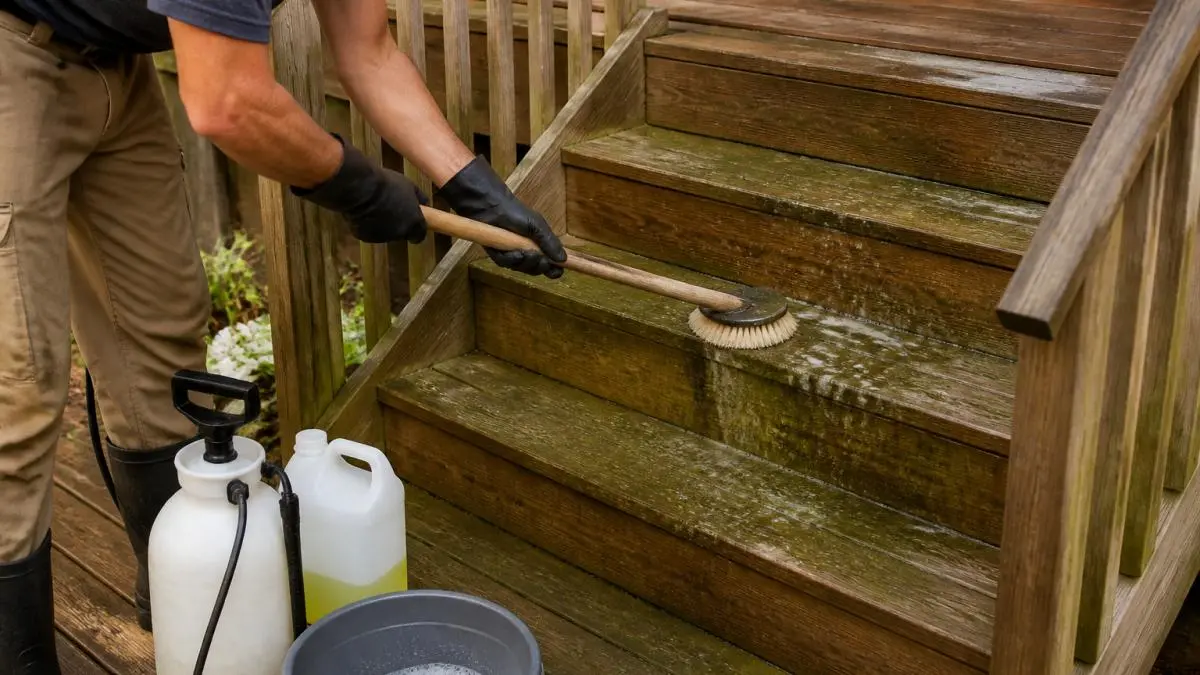
Wet the stairs first with a garden hose so the cleaner doesn’t dry out before it works. Work one or two steps at a time, never the whole staircase.
Step 3: Scrub each stair, tread, riser, and edges
Use a stiff-bristle deck brush. A long-handled brush lets you scrub from a stable position instead of crouching on a wet step.
Scrub in this order on each step:
- The tread, working from the back edge toward the nosing so you push debris off the front.
- The nosing and the seam where the tread meets the riser.
- The riser face.
- The stringer edges on both sides.
Use firm pressure but let the cleaner do most of the work; if you’re grinding hard enough to raise wood fibers, you’re scrubbing too aggressively. On painted or stained stairs, test a hidden spot first, scrubbing can dull or lift the coating.
Step 4: Rinse from the top down
Rinse each cleaned step thoroughly with a garden hose at moderate pressure. Work from the top downward so dirty water and loosened algae run off the lower steps instead of back onto the ones you just finished.
Rinse the risers and stringers too. Cleaner residue left in the seams will dry into a chalky film and can damage the finish.
Step 5: Dry the stairs completely
Use a squeegee or push broom to move standing water off each tread, then let the stairs air dry. Don’t let anyone use them until fully dry, wet wood without algae is still slippery, and wet wood with residual cleaner is worse.
Step 6: Repeat on stubborn growth
If green staining remains after the stairs dry, wait 24 hours and repeat. Two applications are common on north-facing or heavily shaded stairs where growth has been established for a season or more.
Clean stairs bottom-up for safety, but rinse top-down for a clean result. Those two directions are not the same, and getting them backwards either puts you on a wet step or washes dirt back onto finished treads.
A note on pressure washing stairs
A pressure washer can strip algae fast, but on wood stairs it’s easy to do permanent damage: high pressure etches the grain, splinters the nosing, and drives water into the seams where the tread meets the riser, exactly where you don’t want trapped moisture. If you use one at all, keep the tip well back, use the lowest effective pressure, and never aim it straight down into a joint.
Best Cleaner for Algae on Wood Decks and Stairs
Not all cleaners are created equal. The wrong one can damage your wood or harm nearby plants.
Oxygen-based cleaners are your best bet: safe for wood, effective against algae, and they break down organic growth without bleach’s harsh effects.
Avoid: Pressure washers on wooden stairs.
Read the label and make sure the cleaner is rated safe for your deck’s wood type, some suit softwoods like cedar, others pressure-treated lumber.
Using Sodium Percarbonate Deck Cleaner for Safe Results
Sodium percarbonate is the active ingredient in most deck-safe cleaners, and it works differently than bleach. When it contacts water, it releases hydrogen peroxide and soda ash, which break down algae cell walls without damaging wood fibers, a gentler reaction that leaves no harsh residue.
How to use it safely:
- Wear gloves and eye protection
- Mix according to package directions, don’t overconcentrate
- Apply with a pump sprayer or mop
Sodium percarbonate breaks down into harmless compounds, so you’re not leaving toxic residue on your stairs, it’s safer for pets and plants than bleach-based cleaners.
How to Prevent Algae on Deck Stairs Long-Term
Removal is one thing. Prevention is better.
Improve drainage. Water that sits breeds algae.
Increase sunlight. Trim tree branches that shade the stairs.
Ensure proper ventilation. Air circulation dries the surface faster.
Clean gutters and downspouts. Water dripping onto stairs keeps them wet.
These steps won’t eliminate algae forever, but they slow its return significantly.
Verifying Your Stairs Are Safe Again
Cleaning isn’t finished when the green is gone, it’s finished when the stairs are dry and confirmed safe to walk on. Most guides stop at ‘rinse and let dry,’ leaving you guessing. Here’s how to check.
Step 1: Confirm the stairs are fully dry
Don’t test traction on a wet surface. Wet wood is slippery regardless of algae, so a wet test tells you nothing useful.
Wait until the wood is dry to the touch across the full tread, including the seam at the back and the nosing. On a shaded or north-facing staircase, that can take most of a day.
Step 2: Run the traction check
Once dry, do this in order:
- Visual check. Look at each tread in good light. Any green tint, dark streaking, or black speckling means growth is still present; clean wood should read as a uniform color.
- Dry-hand test. Run your palm across the tread. It should feel like wood, slightly textured, not slick or soapy. A waxy or filmy feel means cleaner residue needs another rinse.
- Wet-traction test. Mist one tread lightly with a hose, stand on the ground or a stable step below it, and press your foot onto the wet tread with your weight. You should feel grip; if your foot slides even slightly, stop, the surface is not safe yet.
- Edge test. Check the nosing and the seam where the tread meets the riser, the spots that stay slick longest and most commonly cause a slip.
If any step fails the wet-traction test, repeat the cleaning on that step and re-test after it dries.
Step 3: Decide whether the surface itself is the problem
Sometimes the algae is gone and the stairs are still slippery. That’s a different problem, and no amount of scrubbing fixes it.
- Smooth, sealed, or painted treads. A glossy finish on a wet stair is slippery on its own. Cleaning removes the algae but not the slickness of the coating.
- Worn or polished wood. Years of foot traffic can burnish a tread until the grain is smooth. That surface has lost its natural grip.
- Cracked, checked, or splintered treads. These hold water, regrow algae fast, and are a trip hazard independent of slipperiness.
If you land in any of these categories, the fix is a surface treatment, not a cleaning cycle:
- Anti-slip strips or treads applied to the nosing of each step.
- A textured deck coating designed for stair treads.
- Replacement of worn treads with new boards, followed by a proper seal.
Test one step with an anti-slip product before committing to the whole staircase. Some products change the appearance of the wood or trap dirt differently than the surrounding treads.
Step 4: Set a re-check interval
Stairs that grew algae once will grow it again if the conditions that caused it haven’t changed. Walk the stairs after every heavy rain for the first month after cleaning.
A simple rule: if the stairs feel slick when wet, treat them as unsafe and clean them, don’t wait for visible green growth. The slime layer that causes falls is often present before it’s obvious to the eye.
When to Call a Professional
DIY cleaning works for light to moderate algae. But some situations call for professional help.
Call a professional if:
- The algae covers more than 50% of the stair surface
- The stairs have structural damage or rotting wood
- You’re uncomfortable working on elevated surfaces
Professional pressure washing services have the equipment and expertise to handle stubborn algae safely, know how to clean wood stairs without damage, and can assess whether your stairs need repair or reinforcement.
Slippery deck stairs are a genuine hazard. Removing algae protects your family and guests from falls, and cleaning is straightforward with the right approach: start with an oxygen-based cleaner, scrub with a stiff brush, rinse thoroughly, and dry completely.
Frequently Asked Questions
What’s the safest way to clean slippery deck stairs without damaging the wood?
Start with an oxygen-based cleaner diluted to manufacturer instructions, apply it to one stair at a time, and let it dwell for 10-15 minutes before scrubbing gently with a stiff-bristle brush. Rinse thoroughly with a garden hose set to low pressure. Avoid high-pressure washing on wood, which can splinter the grain and cause lasting damage. Always work on dry conditions and wear slip-resistant shoes while cleaning.
How can I use sodium percarbonate to clean my deck stairs?
Mix sodium percarbonate powder with hot water according to package directions, typically 1 cup per gallon. Pour or spray the solution onto your deck stairs, allowing 15-20 minutes dwell time for the oxygen to break down algae and mold. Scrub with a stiff-bristle brush, working one stair at a time. Rinse thoroughly with a garden hose. This oxygen-based approach is gentler on wood than chlorine bleach and won’t harm surrounding plants when diluted properly.
How can you keep algae from growing back on deck stairs?
Improve air circulation by trimming nearby trees and shrubs to reduce shade and moisture. Clean debris and standing water from stairs regularly, as algae thrives in damp environments. Apply a deck sealant or protective finish annually to create a barrier against spore settling. Ensure water drains away from stairs rather than pooling. Consider installing a roof or overhang if stairs stay wet after rain, and sweep stairs weekly to remove organic material that feeds algae growth.
Can I use dish soap to clean algae off my wood deck stairs?
Dish soap alone is not effective for removing established algae, green stains, or mold from wood decks. While it can help with rinsing, it lacks the active ingredients needed to break down the biological growth. Oxygen-based cleaners or cleaners formulated specifically for deck algae are far more effective. If you use dish soap, combine it only with a proper deck cleaner solution, and test on a hidden area first to ensure it won’t damage your wood finish.