Table of Contents
- Why Mold Keeps Coming Back on Your Roof
- Step 1: Inspect Your Roof to Find the Source
- Step 2: How to Clean Mold Off Roof Shingles Safely
- Step 3: Apply Roof Mold Prevention Treatments
- Step 4: Fix Ventilation and Shade Problems
- Step 5: Schedule a Yearly Maintenance Routine
- Pressure Washing Cost for Roof Cleaning: What to Expect
- Conclusion: Stop Mold Before It Damages Your Shingles
- Frequently Asked Questions
Last Updated: September 6, 2026
Why Mold Keeps Coming Back on Your Roof
Roof mold often returns within months of a cleaning because the underlying environmental conditions were never addressed.
Algae and fungal growth need shade, humidity, and organic debris to survive. Remove only the visible stains and the spores simply germinate again.
Below is an eight-step system that stops the cycle for good, covering inspection, safe cleaning, prevention, and maintenance.
Step 1: Inspect Your Roof to Find the Source
A thorough inspection reveals whether you’re dealing with surface algae, deeper fungal growth, or an underlying issue like poor drainage.
Examine north-facing slopes and areas under tree cover, which stay damp longer. Look for dark streaks indicating algae and moss patches that trap moisture. Also inspect gutters, clogged gutters cause water to pool and seep under shingle edges.
A common mistake is skipping the attic check. Proper ventilation is critical because heat rising from your home meets cold roof decking, causing condensation. According to guidance from the U.S. Department of Energy on attic ventilation, balanced intake and exhaust vents keep the roof deck dry and prevent moisture buildup that fuels mold growth.
Step 2: How to Clean Mold Off Roof Shingles Safely
How to clean mold off roof shingles safely starts with rejecting high-pressure washing, which strips protective granules and shortens your roof’s life.
The correct approach uses low pressure combined with a chemical treatment. Here’s the process:
- Mix a cleaning solution designed for roof surfaces, typically a sodium hypochlorite blend diluted with water.
- Apply the solution starting from the bottom of the roof and working upward to avoid creating permanent bleach streaks.
- Allow the solution to sit for 15 to 20 minutes so it can break down the biofilm and algae spores.
- Rinse gently with low pressure, keeping the nozzle at a safe distance to protect the shingles.
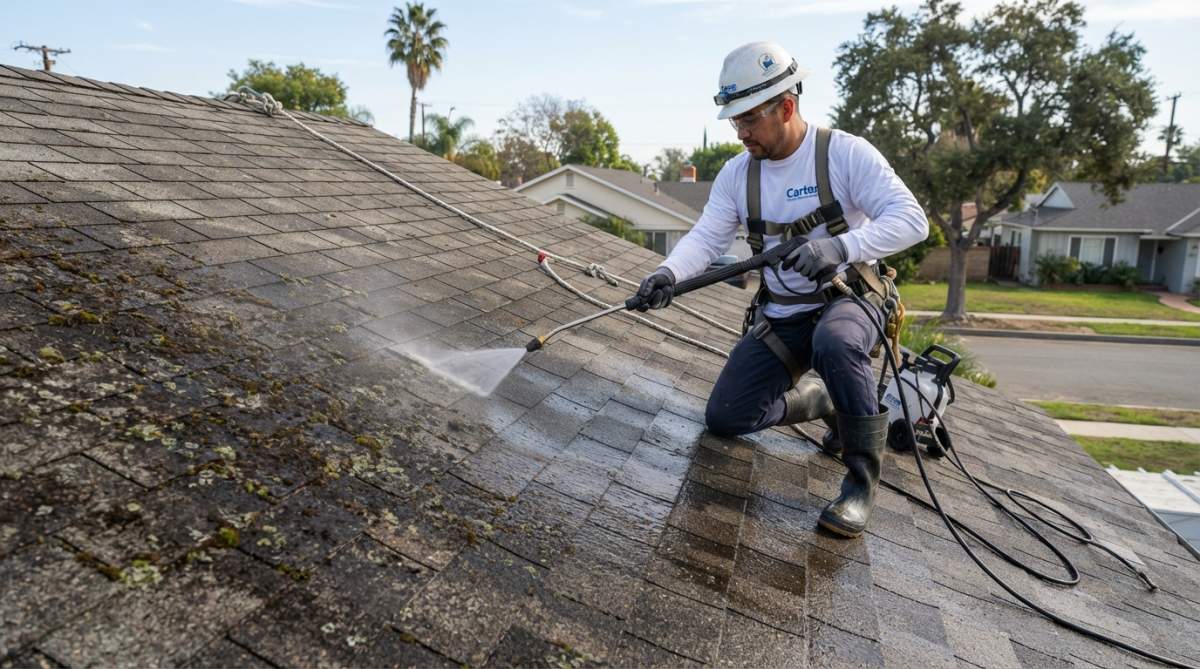
Never use a pressure washer set above 1,200 PSI on asphalt shingles. High pressure forces water under the shingle edges and blasts away the granules that protect against UV damage, which can void your roofing warranty and accelerate deterioration.
Step 3: Apply Roof Mold Prevention Treatments
Cleaning removes the visible problem; prevention stops the return. Treatments fall into two categories, chemical inhibitors and physical barriers, but the right choice depends on your roof material and tolerance for chemicals near landscaping.
Chemical Inhibitors: The Standard Approach
For immediate protection, apply a zinc-based solution after cleaning. A 1% zinc sulfate solution applied with a low-pressure sprayer leaves a residual layer preventing spore germination for up to two years. Treating surrounding trees and gutters also reduces the organic debris that feeds mold.
Bleach-based cleaners and zinc sulfate can kill shrubs, stain concrete, and contaminate runoff that reaches storm drains. Before applying any chemical treatment, cover sensitive plants with plastic sheeting and rinse them thoroughly if they get splashed. Check your local municipal codes, some jurisdictions restrict the use of copper or zinc compounds due to aquatic toxicity concerns.
Eco-Friendly and Non-Toxic Alternatives
For those concerned about chemical runoff, oxygen bleach (sodium percarbonate) mixed with water breaks down into oxygen, water, and soda ash, leaving no toxic residue. It doesn’t leave a long-lasting inhibitor layer but safely removes the organic debris mold needs to re-establish.
Commercial products containing beneficial bacteria or enzymes outcompete mold spores for nutrients, creating a microbiome where algae and fungi cannot gain a foothold. They require reapplication every 6 to 12 months but are safe for pets, plants, and groundwater.
Material-Specific Prevention Strategies
Your roof material dictates which prevention method is safe and effective:
- Asphalt shingles: Zinc strips are the gold standard. The zinc oxide layer that forms as rain washes over the strip is highly effective at preventing algae re-growth. Avoid copper strips on asphalt, copper ions can accelerate shingle deterioration in some formulations.
- Metal roofs: Mold is rare on standing-seam metal because the surface is smooth and sheds water quickly. If you see growth, it’s usually in seams or around fasteners. A zinc-rich primer applied to those areas during installation is the best prevention. Avoid acid-based cleaners, which can etch the metal’s protective coating.
- Clay and concrete tiles: These porous materials absorb moisture, making them prone to moss and lichen. Copper strips are more effective than zinc here because copper ions are more mobile and penetrate deeper into the porous surface. However, copper will cause green staining on light-colored tiles below the strip, a trade-off to consider.
- Wood shakes: Never use bleach or zinc on wood shakes, it will gray the wood and shorten its life. Instead, install a copper or zinc strip above the shake field and rely on the metal ions to prevent fungal growth. The wood itself should be treated with a borate-based preservative during installation to resist rot from the inside out.
Zinc and Copper Strips for Long-Term Control
For a more permanent solution, consider installing metal strips near the roof ridge. Zinc strips and copper strips work by releasing ions whenever rainwater runs across them. These ions create an environment where algae and fungal spores cannot survive, effectively treating the entire slope below the strip.
Installation is straightforward: slide the strip under the shingle course near the ridge, leaving a few inches exposed. The metal should be at least 1 inch wide to ensure adequate ion distribution. This method is particularly effective on roofs with heavy shade exposure, where mold tends to recur most aggressively.
For maximum longevity, use 99% pure zinc or copper strips rather than plated or alloyed versions. Plated metals corrode unevenly and lose effectiveness within a few years, while pure metal strips can last 20 years or more. A common pattern is to install strips on every roof slope, not just the shaded ones, sunny slopes still get enough rain to activate the ions and prevent future colonization.
When to Skip Chemical Prevention Entirely
If mold is driven by poor drainage or ventilation, no chemical treatment will hold. Fix the moisture source first, applying zinc to a roof that stays damp from clogged gutters is like painting over rust. Always pair prevention with the ventilation and shade fixes in Step 4.
Step 4: Fix Ventilation and Shade Problems
Even the best chemical treatments fail if your roof stays damp. Addressing airflow and shade is the difference between a temporary fix and a lasting solution.
Proper ventilation lets heat and moisture escape the attic, keeping the roof deck dry. Check that soffit vents are clear of insulation and ridge vents aren’t blocked. Without adequate airflow, humidity rises and causes condensation that promotes fungal growth.
Tree branches that overhang your roof block sunlight and drop organic debris that feeds mold. Trimming branches to at least 6 feet of clearance lets sunlight dry shingles faster. North-facing slopes naturally receive less sun and may need more aggressive prevention.
Step 5: Schedule a Yearly Maintenance Routine
Preventing recurring mold is an ongoing effort. A yearly maintenance schedule catches small problems early, but the right schedule depends on your climate and roof material.
Climate-Based Maintenance Adjustments
Tailor your schedule to your climate:
- High-humidity climates (Southeast, Gulf Coast): Mold spores are airborne year-round. Plan for a soft wash cleaning every 18 to 24 months, not the typical 3-year cycle. Inspect for algae streaks after every major rain event, if you see dark lines within 6 months of cleaning, your prevention treatment isn’t strong enough.
- High-shade environments (heavily wooded lots, north-facing slopes): Shade keeps shingles damp long after the rest of the roof dries. Trim branches twice a year, once in early spring and once in late fall, to maximize sun exposure. Consider installing wider zinc strips (2 inches instead of 1 inch) to compensate for the reduced drying time.
- Arid or semi-arid climates (Southwest, Mountain West): Mold is less aggressive here, but dust buildup creates a food source when rare rain events occur. A simple rinse with a garden hose on a low setting twice a year removes the dust film before it can support algae growth. Your cleaning interval can stretch to every 4 to 5 years.
- Snow-prone regions (Northeast, Midwest): Ice dams and snow accumulation trap moisture against shingles for months. In late winter, use a roof rake to remove heavy snow from the bottom 3 feet of the roofline. This prevents meltwater from backing up under shingles and creating the damp conditions mold needs.
Material-Specific Maintenance Tasks
Your annual inspection should focus on material-specific vulnerabilities:
- Asphalt shingles: Check for granule loss in the gutters, excessive granules mean the shingles are aging faster than expected. Look for curling or cupping edges, which allow water to wick under the shingle. Replace any shingle that has lost more than 30% of its granules.
- Metal roofs: Inspect the fasteners and seam seals. A loose screw or dried-out rubber gasket is a water entry point that will eventually cause mold on the decking below. Re-torque fasteners annually and replace any gaskets that show cracking.
- Clay and concrete tiles: Walk the roofline and look for cracked or slipped tiles. A broken tile exposes the underlayment to moisture, and once that gets wet, mold spreads along the entire deck. Replace damaged tiles immediately, don’t wait for the next scheduled maintenance.
- Wood shakes: Look for split or rotting shakes, especially on the north side. Wood absorbs moisture more readily than other materials, so any damaged shake becomes a mold reservoir. Replace affected shakes and treat the surrounding area with a borate solution.
The Seasonal Checklist That Works
Create a seasonal checklist that includes gutter cleaning to prevent water backup. In the fall, remove leaves and pine needles from valleys and around chimneys. In the spring, inspect for damaged or curling shingles.
The Asphalt Roofing Manufacturers Association maintenance guidance recommends regular inspections to identify issues early, noting that proactive care significantly extends roof longevity. A professional assessment every few years can spot developing problems that aren’t visible from the ground.
The most effective maintenance schedule combines a soft wash cleaning every 2 to 3 years with annual gutter clearing and a visual inspection each spring and fall. This catches moisture buildup before it leads to structural damage. Adjust the cleaning interval based on your climate, more frequent in humid or shaded areas, less frequent in arid zones. And always inspect the specific failure points of your roof material, not just the surface appearance.
Tracking Your Maintenance History
Keep a log of every cleaning, inspection, and repair, noting the date, findings, and treatment applied. This helps spot patterns, if mold returns on the same slope every 14 months, that area needs stronger prevention. A written history also supports warranty claims, which often require proof of regular maintenance.
Pressure Washing Cost for Roof Cleaning: What to Expect
Many homeowners delay roof cleaning assuming it’s expensive, but neglect costs far more. Understanding the pressure washing cost helps you budget for this essential maintenance.
Pricing varies by roof size, pitch, material, and mold severity. A steep roof requires more safety equipment and labor. A basic soft wash costs less than a full service that includes zinc application and gutter cleaning.
When comparing quotes, ask what the price includes. Some providers quote a basic wash but charge extra for the mold prevention treatment, which is the step that actually keeps mold from coming back. A complete service should include both cleaning and prevention.
The most reliable way to get an accurate figure is to request a detailed estimate from a professional. For Los Angeles homeowners, Carters Precision Pressure Washing provides free estimates.
Conclusion: Stop Mold Before It Damages Your Shingles
Recurring roof mold is more than an eyesore; it’s a threat to your roof’s structural integrity. When algae and fungal growth are left untreated, they break down the asphalt in your shingles, causing granule loss and premature aging. The Environmental Protection Agency guidance on mold remediation emphasizes that controlling moisture is the key to preventing mold problems, a principle that applies directly to your roofing system.
The eight steps give you a complete strategy: inspect, clean safely with low pressure, apply prevention, fix ventilation, and maintain a yearly schedule. Addressing the conditions that allow mold to thrive breaks the cycle of recurring growth.
If you’re ready to stop fighting mold, professional help makes the difference. Carters Precision Pressure Washing brings professional equipment and techniques. Call today for a free estimate.
Frequently Asked Questions
How can I prevent mold from growing on my roof?
Preventing recurring mold on roof surfaces starts with removing the organic debris that feeds it. Clean gutters twice a year, trim overhanging branches to let sunlight dry the shingles, and address poor attic ventilation. Installing zinc or copper strips near the ridge line releases metal ions that stop algae spores from germinating. A professional cleaning every 2 to 3 years removes existing growth before it spreads under the shingles.
Is it safe to pressure wash my roof to remove mold?
Pressure washing a roof is risky. Standard pressure washers push water at 1,500 to 3,000 PSI, which can blast away protective shingle granules and shorten the roof’s lifespan. If you want to clean mold off roof shingles, use a soft wash method with low pressure and a bleach-based or eco-friendly solution. A professional service knows the right pressure and chemical mix for your specific shingle type.
What time of year is worst for mold growth on roofs?
Mold and algae grow fastest during warm, humid months, typically from late spring through early fall. Moisture buildup from morning dew combined with temperatures above 70°F creates ideal conditions for spore germination. The north-facing side of a roof stays damp longer and usually shows the most growth. Schedule your roof inspection and cleaning in early spring so you start the warm season with a clean surface.
How much does professional roof mold cleaning cost?
Pressure washing cost for roof cleaning varies widely based on roof size, pitch, material, and how much growth has accumulated. A single-story home with a simple layout costs less than a steep, multi-section roof that requires extra safety equipment. Most quotes include the cleaning solution, low-pressure application, rinsing, and any spot treatments. Contact Carters Precision Pressure Washing for a free estimate tailored to your roof’s condition.